Hookah setup step by step guide is exactly what most new enthusiasts need before attempting their first session, as jumping straight into the process without understanding the correct sequence almost always leads to frustrating results and wasted materials. Every component in a hookah system plays a specific role, and assembling them in the right order makes an enormous difference in the final smoking experience.
Whether setting up for a solo evening or preparing for a group gathering, following a structured approach from start to finish eliminates the most common mistakes that beginners and even intermediate users make repeatedly without realizing where things went wrong.
Step One: Preparing the Base and Stem
The first stage of any proper hookah setup involves getting the base filled correctly and attaching the stem securely before any other components are introduced into the equation.
Filling the Base with the Right Amount of Water
Water quantity is a deceptively simple variable that carries enormous influence over the overall quality of every draw taken throughout the session.
- Pour cold water into the glass base until the bottom of the downstem sits approximately one to two centimeters below the water surface, striking the ideal balance between smooth filtration and comfortable draw resistance.
- Cold water or a handful of ice cubes added directly into the base will noticeably cool the smoke temperature, producing a smoother and more refreshing experience particularly appreciated during longer sessions.
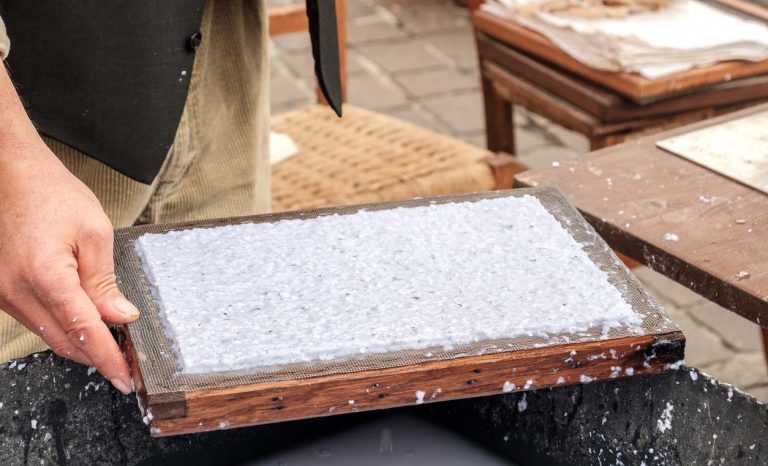
Step Two: Packing and Preparing the Bowl
With the base and stem properly assembled, attention shifts entirely to the bowl where the shisha tobacco will be packed and prepared for heating.
Loading the Tobacco Correctly
Proper tobacco loading technique determines how evenly heat travels through the shisha and how long the session maintains its peak flavor before degrading.
- Fluff the shisha tobacco gently with a fork before loading to break apart any clumps, then sprinkle it loosely into the bowl until it sits just below the rim without being compressed or tightly packed down.
- Use a toothpick to create small vertical channels through the packed tobacco reaching down to the bowl holes, improving airflow circulation and ensuring more even heat distribution from the very first draw.
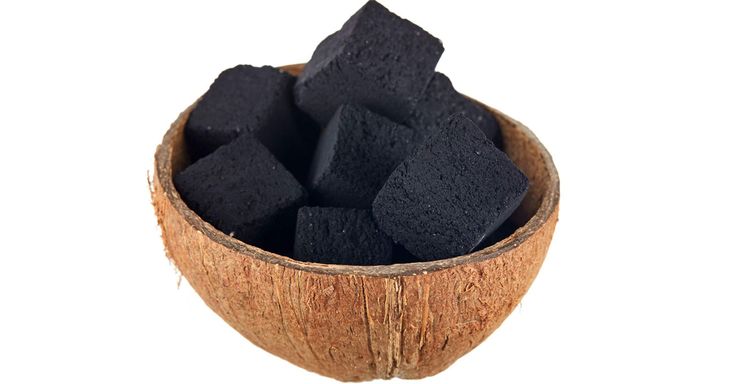
Step Three: Lighting and Placing the Charcoal
The final and most consequential step in the entire setup process involves properly lighting the charcoal and placing it onto the prepared bowl with precision and care.
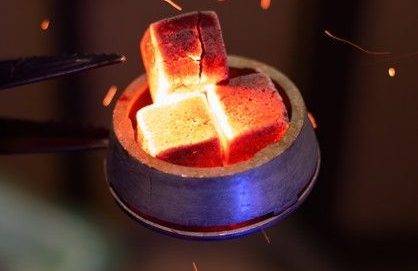
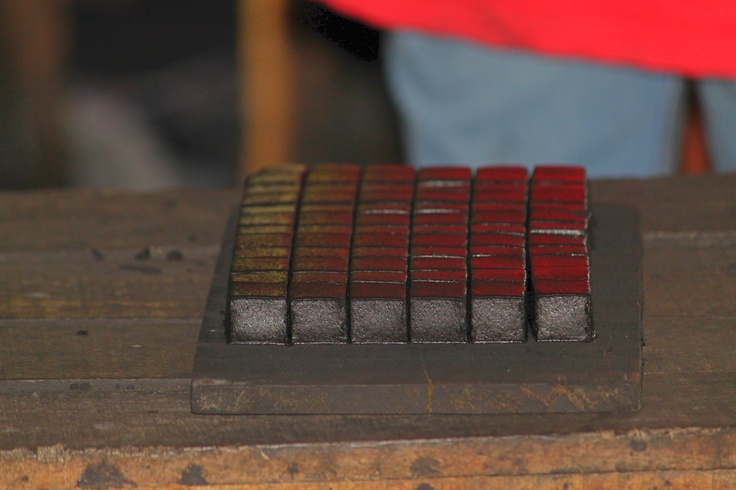
Lighting Natural Charcoal the Right Way
Natural coconut shell charcoal requires a dedicated electric coil burner for proper lighting and should never be rushed through an incomplete lighting process that leaves black spots remaining on any surface.
- Place the charcoal cubes flat on the electric burner and allow each side to heat until glowing uniformly orange before flipping, repeating the process until every surface shows consistent color with absolutely no dark areas remaining.
- Shisha charcoal from indobriquettescharcoal.com lights evenly and reliably due to its uniform density, making the lighting process noticeably more straightforward compared to inconsistent charcoal products that require significantly longer preparation time.
Conclusion
Following a structured hookah setup step by step guide transforms what can feel like an overwhelming collection of components into a logical and satisfying ritual that produces consistently enjoyable results. Each step builds directly on the previous one, and respecting the sequence is what separates sessions that disappoint from those that genuinely deliver.
Pairing this methodical approach with quality natural charcoal from indobriquettescharcoal.com ensures that every carefully prepared setup reaches its full potential from the very first draw through to the final satisfying moments of a well-executed session.